Defining logical reading order in InDesign
PDF tags are not only needed to give content a semantic meaning, but also to determine the logical reading order. In InDesign, the order of the tags can be defined so that the logical reading order is already correct for the generated PDF.
What does logical reading order mean? Find out more in the glossary.
Articles panel #
In order to define the logical reading order already in InDesign, the “Articles” panel is required. All relevant content must be packed into an article.
- Select a text frame (or another object) first.
- If no articles exist yet, a new article can be created directly with the selected object. Click on the small page symbol in the bottom right corner of the panel. Then you will be asked to give the article a name. The best is to use one descriptive word.
- If an article already exists, it can be added to an article by clicking on the plus symbol in the bottom right corner of the panel.
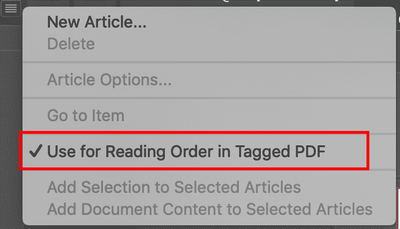
Before the document can be exported, the option “Use for reading order in Tagged PDF” must be activated in the Articles panel options.

Later adjustments #
If an object has to be moved, this can be done simply by “Drag&Drop”. Click and drag an object to the correct position in the same or another article.
Threading text #
If text frames are linked together, the text flows dynamically from one frame to the next. This is not only practical, but also makes sense from a technical point of view. They are tagged in a common container.
In the “Articles” panel, linked text frames are treated as one object. If you add the first text frame, all threading text are included and follow the defined order.
More about threading text you can read in Adobe’s online manual.
Anchored objects #
Images or other objects can also be integrated into an article in order to tag them in the correct order.
In order to place an image at a certain position in the logical order, it usually has to be anchored within a text frame. If this is done, the image can be considered as part of the text frame. It no longer appears separately in the “Articles” panel.
To anchor an object, click on the filled, small square in the frame at the top edge. Keep the mouse button pressed and move the pointer to the desired position within a text frame and release it.
More about anchored objects you can read in Adobe’s online manual.
Since images are non-text content, an alternative text must be provided if they are relevant to the content. If they are not relevant, they do not belong in an article. For further information, see also alt text in the glossary or “Add an alt text”.
Form fields and tab order #
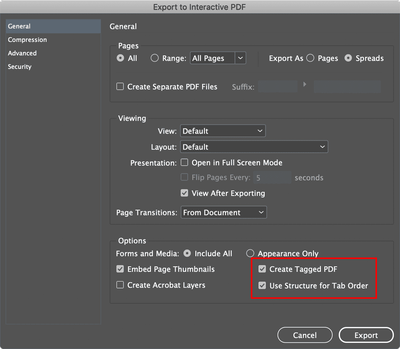
Form fields are also objects that are best anchored within a text frame as well. When exporting PDF as “Adobe PDF (Interactive)”, the option “Use Structure for Tab Order” can be activated and the tab order is adopted correctly according to the logical reading order.

Additional features with MadeToTag #
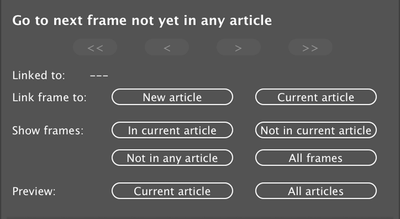
The paid InDesign plugin MadeToTag from Axaio can help you work with the “Articles” panel.
In the second task step of the plugin, all contents of an article or all articles can be shown or hidden. This helps to find missing content which has to be added to an article. On the other hand, objects that should not be tagged can be better identified as well.

Similar to what is described in “Check semantics and logical reading order”, the plugin can be used to preview tags and their order within InDesign.